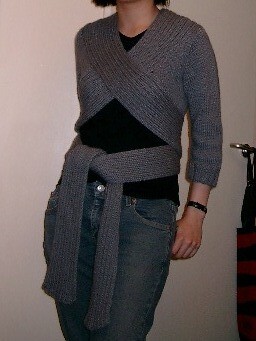
17 February 2007

Reknit: Ballet Wrap


The sash is finally shortened. It probably wouldn't have bothered me if I hadn't noticed a couple inches of the ends peaking out of the bottom of my trench coat one day. I think its weight helped drag it down. I shortened the sash by five inches on each side. It's long enough to stay tied but short enough that it doesn't get in the way of normal life.

In other news, I have one sleeve and the collar to Gacci to go.


I seamed up one side of the cardi and set in the first sleeve just to make sure it puffed the way I liked. Originally, I made the top of the sleeve cap twice as wide as it was supposed to be and used the one-over-two bind-off method. This didn't produce as much puff as I'd hoped for, partly due to the rib drawing the fabric in, and I found it hard to seam. I ripped back a bit and inserted a couple short rows and bound off by doing k2tog, k2tog, sl first stitch over, etc. This was easier to seem and I liked the end result much better.

The body pieces were much easier to figure out than I expected.


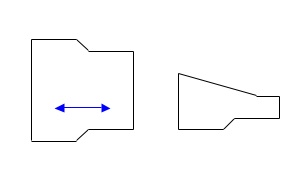
I knitted the pieces sideways starting with the body half. I increased over a couple rows for the armhole shaping before casting on the remaining stitches necessary for the entire armhole. On the back, I bound off the same number of stitches cast on earlier and decreased over the the last couple rows. The front neck shaping is achieved with short rows. I used the yarn-over method and ended up having to fiddle with the yo's on one of the front pieces so that the turning rows wouldn't be visible on the right side. Rather than reversing the shaping for one of the fronts, I simply reversed the rib. For example, If I started the left front K2,P2 I would start the right front as P2, K2. Then I can work the shapings exactly the same for both pieces.

Labels: , ,

06 February 2006

FO: Ballet Wrap...


Pattern: Ballet Wrap by Norah Gaughan (Interweave Knits Spring 2005)
Start/Finish: Dec. 18, 2005-Jan. 10, 2006
Yarn: KnitPicks Andean Silk in slate (23519); Approx. 1110yds/1015m
Needles: Denise US6/4mm and US7/4.5mm circs
Modifications: Adjustments for different row gauge; shortened sleeves

Notes:

This was a very quick and easy knit--I would say it took me about two weeks for the actual knitting. However, I tend to get lazy when it comes to seaming so this piece wasn't actually finished until a bit later.

My stitch gauge matched the pattern, but the row gauge was off. Sometimes it matters, sometimes it doesn't. I would say that due to the way the garment is constructed, it does matter in this case. I had to cut out a couple short row sections on the sash and adjust for the length of the body.

I didn't care for the long, wide-ish sleeves in the pattern. I personally prefer 3/4, fitted sleeves as they make my hands and wrists feel freer to work. I ended up casting on 54 stitches instead of 66, worked the ribbed cuff for two inches instead of five, and only worked one more inch of stockinette before starting the increases in pattern. I cut off about seven inches from the total sleeve length (cuff to shoulder cap).

I used less than 11 balls of Andean Silk. I originally bought 16, two extra balls from what I needed because I'd read of a couple people who needed an extra ball or two than what the pattern calls for. Of course, since I did shorten the sleeves I had extra left over, but after some calculating I found that I probably would not have used more than the amount specified in the pattern if I did make the full sleeves. Well, each knitter knits differently, I suppose, but it's always safer to have more yarn than less.

Overall, I love this sweater. I've worn it twice so far. My only complaint is the length of tied ends of the sash. I originally wanted to make each end about four inches shorter, but when I tried working it out, I couldn't figure out where the extra length was coming from in the photos. It wasn't until it was finished and I tried it on that I realized that the slit in the back was why the ties were so long. That was a *smacks self* moment.

Now if only I can figure out how not to look stoned in photos...

Labels: ,